Occasionally I get “crafty” with dinner (read: I make something that’s not pasta and doesn’t come from a slow-cooker). Last night, the feeling struck. Sam was willing to eat leftovers, and we had mushrooms in the fridge (which he hates). Mushroom risotto was the first thing that popped into my head, so I decided to give it a go. I think it turned out pretty well, and I have plenty of leftovers!

I started with this recipe from the BBC. I had to make a few changes to avoid going to the grocery store: first, I didn’t have any white wine on hand. Second, no parsley and no fancy mushrooms. Just the bagged kind from Tesco, the kind that are just labelled as “MUSHROOMS”, nothing fancy. I’ll warn you now that I cook without really measuring, so if you need that kind of direction it’s probably best to stick to the recipe linked, as I go a little (a lot?) off track.
Here goes nothing!
The EASIEST Mushroom Risotto
 You will need:
– Mushrooms
– Oil
– Garlic or garlic powder
– Rice (Uncooked. Use less than I did.)
– Stock (hot water + bouillon cubes)
– Salt
– Pepper
– Butter
Start by assembling your ingredients. I separated the mushrooms into two groups- one soaks in hot water while the other is fried with oil and garlic powder. The original recipe calls for two different types of mushrooms to do this with, but oh well.
While you’re soaking and frying, make the stock. I used hot water and two bouillon cubes, one veggie and one chicken, and I made it in a 2-litre tupperware pitcher (which came in handy later, you’ll see why).
 Once the fried mushrooms are soft, toss in all of the rice. Coat it with the oil in the pan, which by now will smell deliciously mushroomy. I added the salt and pepper at this point so they’d have a little time to sink in.
Stir in the stock a little at a time. Here’s where the pitcher is handy! A spout helps keep the stock from getting everywhere. Once you’ve added all the stock, remove the pan from heat and mix in some butter. Enough that you get that sticky, risotto-looking consistency.
Voila! Easy, fast, yummy risotto. This took about 20 minutes start to finish, including pauses for picture-taking.
You could easily make this a 1-pan dinner by not splitting the mushrooms into two groups, I don’t think it would make too much of a difference.
I’m going to try this again with something other than mushrooms so Sam can try it too, I’ll update if I come up with any improvements!
 Every year since we were really little, my sister and I have dyed Easter eggs on the Saturday before Easter. We always try to get them done earlier, but an on-time family we are not. I love experimenting with the dyes and colors, and this year I decided to make ombre Easter eggs.
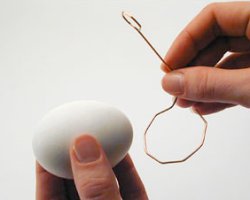
 They’re fairly easy, but a little time-consuming. I did one quick dip of the full egg into the color first, to get a nice base coat. As I pulled them out of the dye with the egg-holder, I paused at intervals to get layered shades. The “bottom” of the egg that’s darkest was in the dye the longest. I like these eggs, at some point I’m going to attempt these again but with blown eggs instead of hard-boiled eggs– I’d like to be able to keep them!


